How to Crop in Photoshop
The crop tool in Photoshop is an essential tool that can help you quickly resize, reshape, and reposition images. In this article, we will discuss what the crop tool in Photoshop is, how to crop in Photoshop, how to adjust the cropped image, and the benefits of using the crop tool.
What is the Crop Tool in Photoshop?
The Crop Tool in Photoshop is a versatile tool used for cropping and resizing images. It allows you to trim, reshape, and proportionally resize images to create the perfect composition. It works by selecting the area of an image you wish to crop and then resizing it to fit the composition you desire.
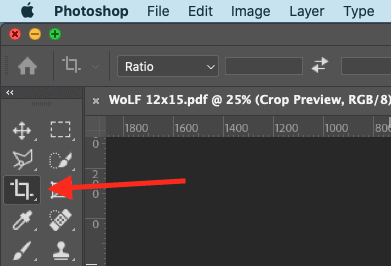
The crop tool a powerful tool for adjusting your canvas size and ensuring that your artwork fits your desired image size, composition, and ratio.
How to Use the Crop Tool in Photoshop
Using the crop tool in Photoshop is a straightforward process. To begin, open the image you wish to crop in Photoshop. Select the crop tool from the Tools panel or press the C key to activate it.
Adjust the handles on the corners of your canvas to resize the crop box. You can then drag to move the crop box to the desired area of the image that you want to crop.
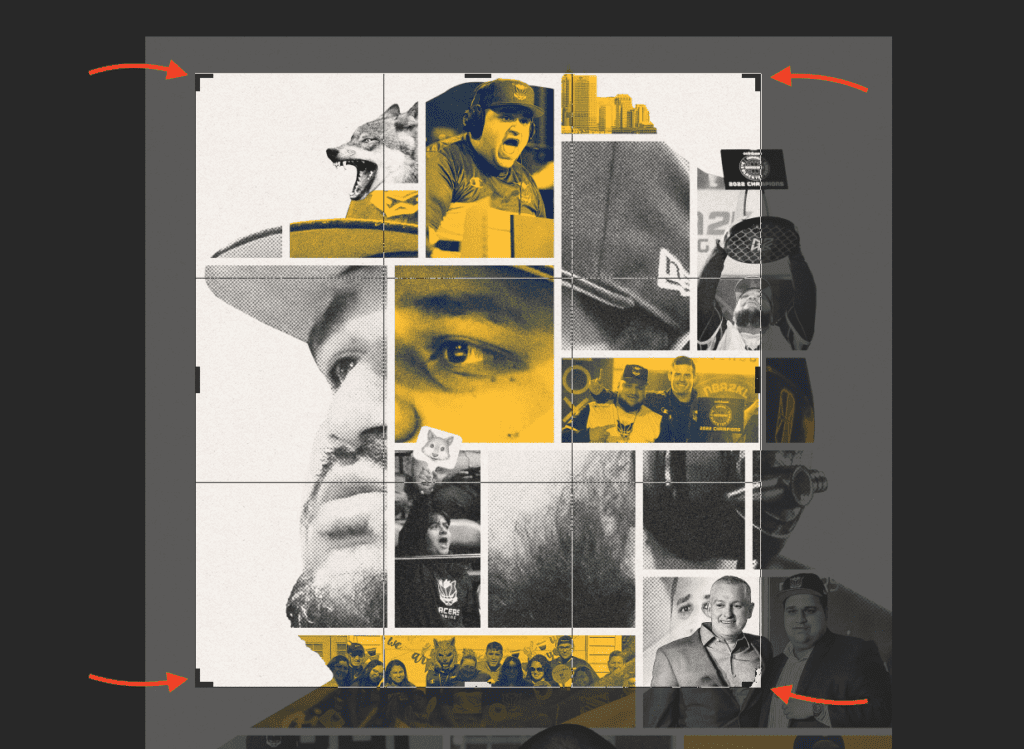
If you need a specific crop ratio or size, use the crop tool options at the top of your Photoshop window when you have the crop tool selected. These crop options include presets, a straightening tool, and the option to delete the extra area of your image.
To crop the image, press the Enter key. If you are not happy with your crop, you can press the Esc key to cancel.
How to Crop an Image to a Specific Ratio
If you’re trying to keep your crop to a specific ratio, you can use the presets or input a custom size.
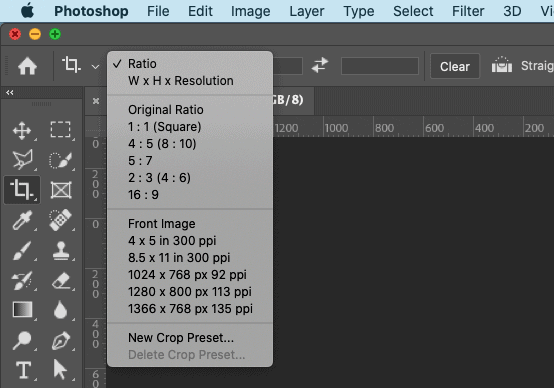
With the crop tool is selected, click on the Ratio dropdown box in the top toolbar. You can use one of the preset ratios or select to crop by width, height, and resolution.
If you select Ratio, you can input a custom ratio and your crop box will keep that size as you scale it up and down.
How to Straighten an Image with the Crop Tool
Not only can the crop tool crop your image, but it can also straighten your image too.
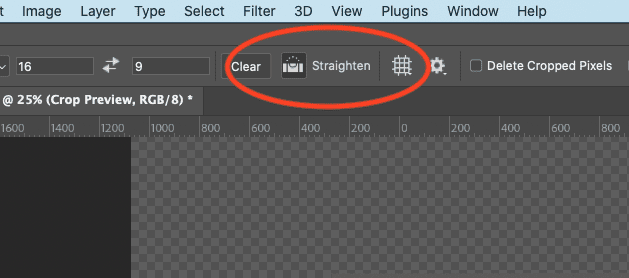
When you have the crop tool selected, you’ll notice several options in the top toolbar. One of those options is a tool called Straighten.
To straighten an image in Photoshop, first select the Crop Tool and then click on the Straighten button in the top toolbar. Next, click and drag on your image to create the horizon line. Photoshop will then straighten your image based on the line you drew.
You can adjust this multiple times or press Command + Z on Mac or Ctrl + Z on Windows to undo your adjustment.
How to Show Grid While Using the Crop Tool
You can overlay various grids and guides while using the crop tool in Photoshop. To do this, you need to select the crop tool and find the grid icon in the extra options in the top toolbar.
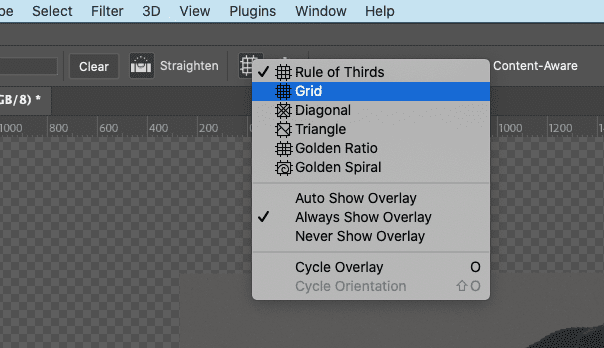
The several different grid options with the crop tool: Rule of Thirds, Grid, Diagonal, Triangle, Golden Ratio, and Golden Spiral.
Choose the option that best fits your composition’s needs. You can select to Auto Show Overlay, Always Show Overlay, or Never Show Overlay. Cycle Overlay gives you the shortcut key O to quickly cycle through the grid options without having to click on the dropdown menu.
Final Thoughts on the Crop Tool in Photoshop
The crop tool in Photoshop is a powerful and versatile tool for cropping and resizing images. It allows you to quickly trim, reshape, and proportionally resize images to create custom artwork. It is also a great way to quickly adjust the composition of a photo and crop it to a specific size. Knowing how to use the crop tool in Photoshop can help you quickly resize your images to fit the needs of your composition.
For more beginner Photoshop tutorials, head over to my Photoshop YouTube Channel.
Spencer Martin
Spencer is a graphic designer and content creator who creates educational tutorials. He graduated with honors from Ball State University and received a BFA in Visual Communication. Today he is the Director of Content for Pacers Gaming and runs Pixel & Bracket LLC, an educational resource for creators.