How to Make a Text Box in Illustrator
In Adobe Illustrator, text can be added to a document in two main ways: point type and area type. These two types of text have distinct differences and are best used in different situations.
What is Point Type in Illustrator?
Point type is a single, standalone line of text that begins where you click with the Type tool and continues until you press the Enter or Return key. Point type is useful when you need to add a short amount of text, such as a label or caption, at a specific location in your illustration.
Point type has no text box. When you hover over the edge of point type with your cursor, you can stretch and skew the type itself by clicking and dragging.
What is Area Type in Illustrator?
Area type, on the other hand, is text that is contained within a defined area, called a text box. When you create an area type, Illustrator automatically wraps the text within the text box and continues on to a new line when the text reaches the edge of the box. Area type is useful when you need to add a larger amount of text, such as a paragraph or article, and want to ensure that it is contained within a specific area of your illustration.
How to Make a Text Box in Illustrator
Now that you know the difference between point type and area type, how do you make a text box in Illustrator?
- To make a text box in Illustrator, select the “Type” tool from the toolbar on the left side of the screen. The Type tool allows you to add text to your Illustrator document. It looks like a capital T and the shortcut key for the type tool in Illustrator is T.
- Click and drag to create a text box of the desired size in your document.
- Type your desired text into the text box. You can also paste text into the text box if you have pre-written text.
- Use the type options in the Character, Paragraph, and Properties panels to adjust the font, size, and formatting of your text. You can change the font family, style, size and also apply bold, italic or underline to your text.
- Hover over the edge of the text box with your cursor and use the handles to adjust the size of the text box.
How to Fill a Text Box with Placeholder Text
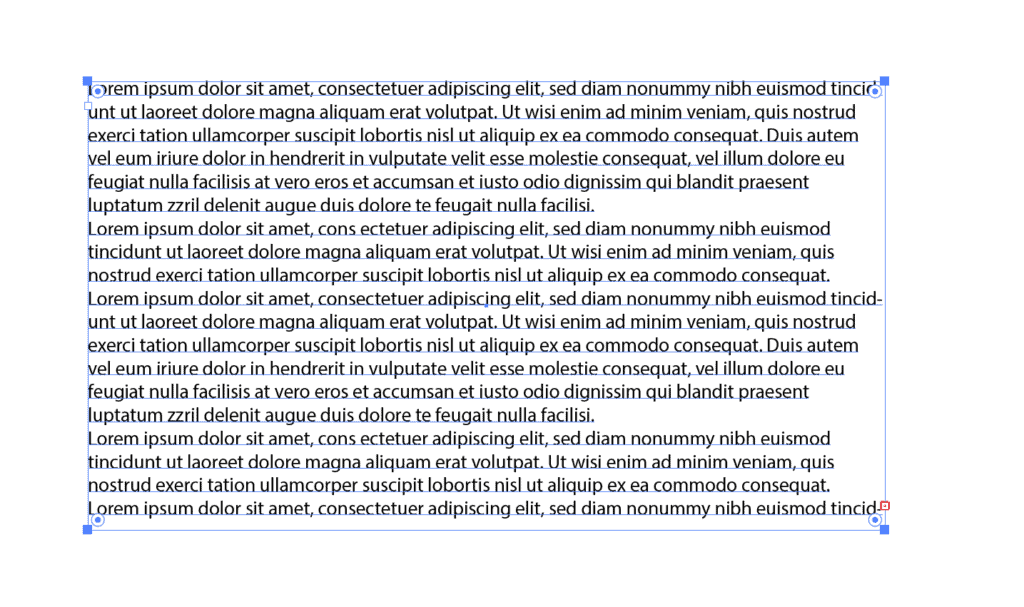
Adobe Illustrator has placeholder text (Lorem Ipsum) that you can use when you don’t have content for your text box.
To fill your text box with placeholder text, first select your text box. Next, go to Type > Fill With Placeholder Text.
This will fill in your text box with “Lorem Ipsum”. Lorem Ipsum is dummy text that is often used as a placeholder in graphic and web design, which you can then stylize or shorten to your need.
What’s in the Paragraph Panel in Illustrator?
The Paragraph panel in Adobe Illustrator provides options for formatting and aligning text within area type or a text box. You can find the Paragraph panel under Window > Type > Paragraph Panel or within the Properties panel. Here are some of the main options that you’ll find in the Paragraph panel:
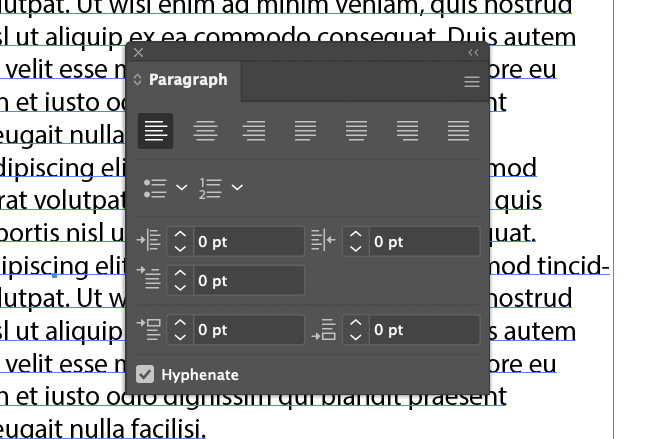
- Alignment: This allows you to align the text within the text box, you can align it to the left, center, right, or justify it.
- Indent: Allows you to set the distance between the text and the edge of the text box. You can adjust the left, right, and first line indents separately.
- Spacing: Allows you to adjust the space between lines of text (leading) and the space between characters (tracking).
- Bullets and Numbering: Allows you to add bullet points or numbered lists to your text. You can also customize the bullet character or numbering format.
- Hyphenation: Allows you to control how words are hyphenated when they reach the end of a line. You can specify the minimum number of characters before a word can be hyphenated and the minimum number of characters that must be left on the last line of a paragraph.
These are just some of the main options that you’ll find in the Paragraph panel, but depending on your version of Illustrator, there might be additional options available. With these options, you can apply different formatting and alignment to your text and make it more presentable.
What Are Area Type Options in Illustrator?
The Area Type Options in Adobe Illustrator provides additional settings that you can use when working with area type text. These options allow you to customize the appearance and behavior of your text within the text box. When you have a text box selected, you can find the Area Type Options under Type > Area Type Options.
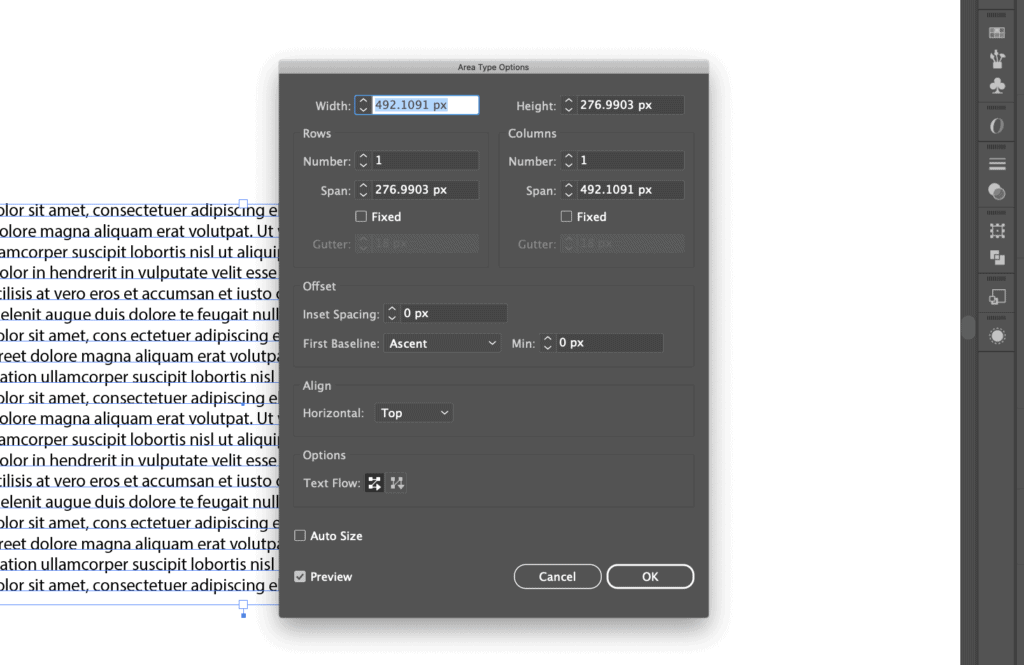
Here are some of the main options that you’ll find in the Area Type Options:
- Width and Height: Allows you to set the width and height of your text box.
- Rows: Allows you to divide the text box into rows, allowing you to specify the number of rows, and the span and gutter space between rows.
- Columns: Allows you to divide the text box into columns, allowing you to specify the number of columns, and the width and gutter space between columns.
- Offset: Allows you to specify the amount of space between the text and the edges of the text box.
- Align: Allows you to align the text within the text box to the Top, Center, Bottom, or Justified.
- Text Flow: Allows you to determine the flow direction of text within your text box.
- Text Box Auto-sizing: Allows you to set the text box to automatically adjust its size based on the text within it.
- Preview: Allows you to see changes made in Area Type Options within your design as you make them.
These are just some of the main options that you’ll find in the Area Type Options, but depending on your version of Illustrator, there might be additional options available. With these options, you can customize the text within the text box.
Final Thoughts on Illustrator Text Boxes
Creating a text box in Adobe Illustrator is simple and straightforward. By using the Type tool, you can create a text box of any size and then add text to it. The Paragraph and Character panels provide various options for formatting and styling the text, such as font, size, color, alignment, and spacing.
Additionally, the Area Type Options provides advanced options for customizing the behavior and appearance of the text within the text box, such as auto-sizing, columns, insets, and alignment.
Using Placeholder Text such as Lorem Ipsum can be a helpful tool when working on a design, but it’s important to replace it with real content before finalizing the design.
By following the steps outlined in this article and experimenting with the different options available in the panels, you should be able to create professional-looking text designs in Illustrator.
For more beginner Illustrator tutorials, head over to my Illustrator YouTube Channel.

Spencer Martin
Spencer is a graphic designer and content creator who creates educational tutorials. He graduated with honors from Ball State University and received a BFA in Visual Communication. Today he is the Director of Content for Pacers Gaming and runs Pixel & Bracket LLC, an educational resource for creators.